Quickstart with a Python Notebook
This tutorial explains how to use a Python virtual environment with the Luminary Cloud SDK to access a pre-written sample notebook in your web browser.
This is the fastest way to get started writing and executing code to run simulations. It’s the best option if you’re looking to quickly get a feel for the Luminary Cloud Python SDK.
Important
If you have never logged in to the Luminary web app, please log in and accept the terms and conditions before proceeding.
Download Files
Clone or download the Luminary tutorials repository from GitHub. This guide uses the Piper Cherokee tutorial notebook.
Caution
To avoid potential problems, make sure there are no spaces in the file path.
For example, do not put the file in a location like this:
C:/My Projects/tutorials
Instead use:
C:/MyProjects/tutorials or C:/My_Projects/tutorials
Environment Setup
Important
It’s highly recommended to use a virtualenv to minimize installation issues and avoid impacting your existing Python environment. However, you can skip this step if you’d like to use an existing Python environment.
Open a terminal inside the tutorials directory that you just created.
Follow the steps in Install the Luminary Cloud Python SDK
under “Create a Python virtualenv (recommended)” to create and activate the environment.
Now, install the Luminary Cloud Python SDK and other required packages for this tutorial:
python -m pip install -r requirements.txt
py -m pip install -r requirements.txt
Run the Notebook Server
With your terminal in the
tutorialsdirectory (and virtual environment activated), start the server:
jupyter lab
A tab should have opened in your browser. If not, look for a URL like this in the command output and open it in your browser (Google Chrome recommended):
http://127.0.0.1:8888/lab?token=...
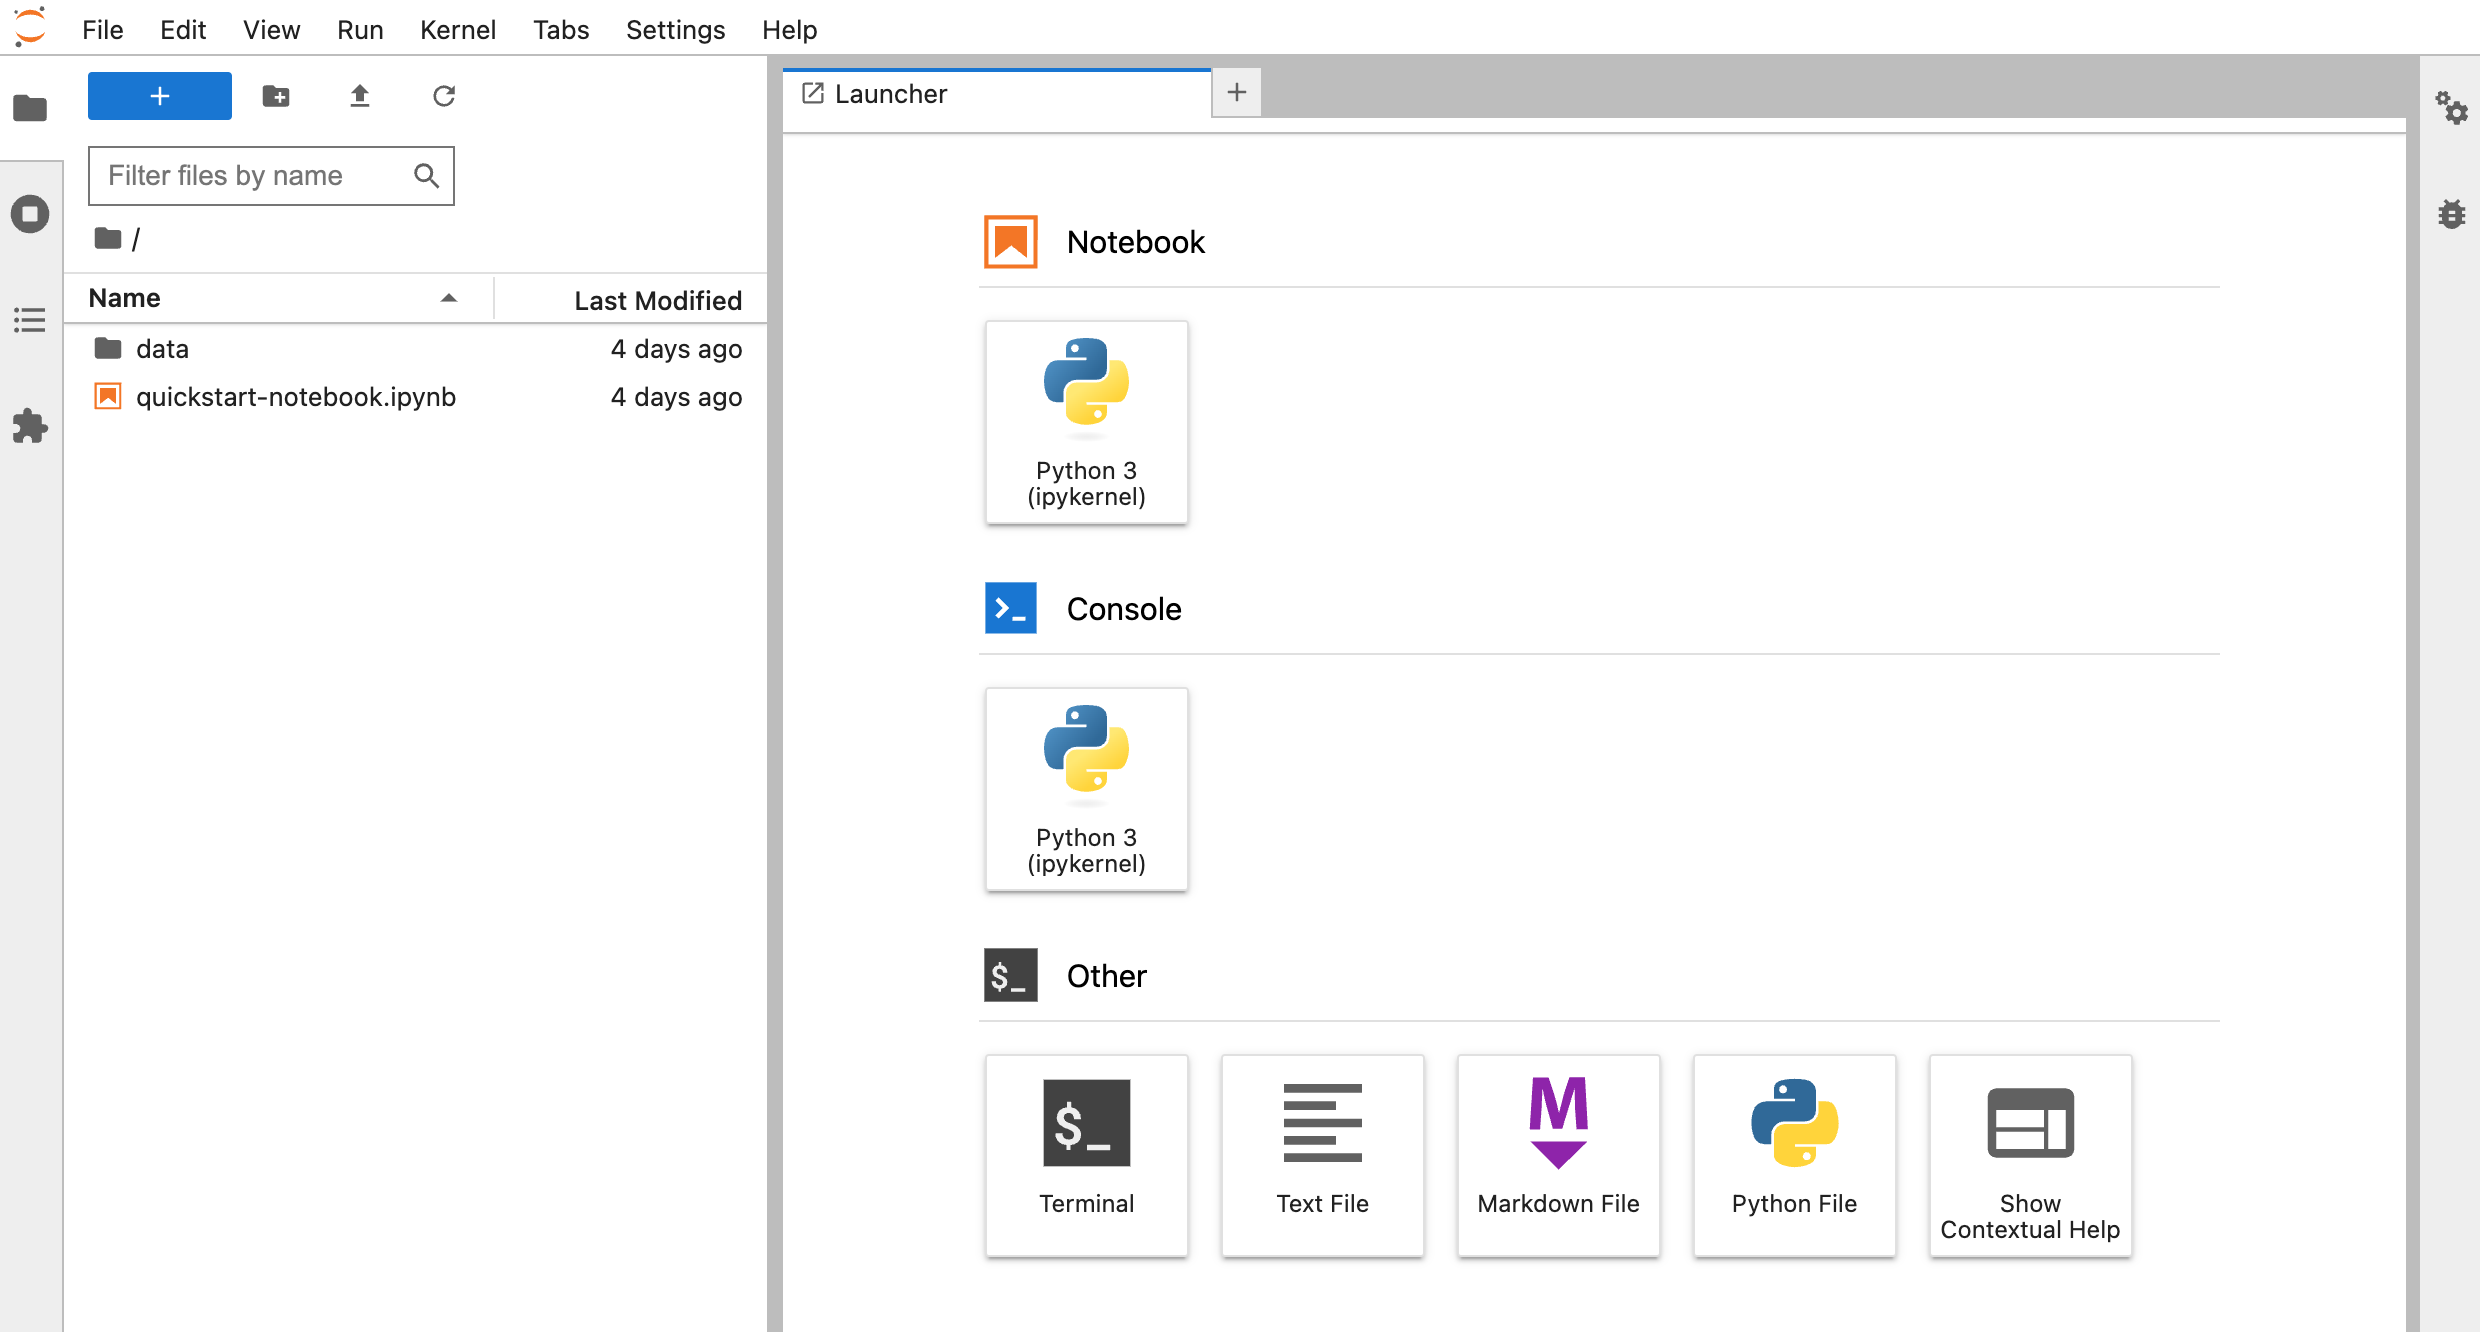
In the left-hand sidebar, find a sample notebook called
piper-tutorial.ipynb. Double-click to open it.Continue the quickstart tutorial by following the instructions in the notebook.
To stop the notebook server, save your files and return to the terminal where
the notebook server is running. Use CTRL-C to interrupt the process and stop
the server.
Using the Notebook Interface
This quickstart tutorial utilizes a pre-made Python notebook to provide a simple way to run and explore simulations. For more information on notebooks, see the JupyterLab documentation.
Manage Files in the File Browser (Recommended)
You can use your operating system’s standard file browser (File Explorer in
Windows, Finder in macOS, etc.) to manage files. Any files added to the
tutorials directory or its subdirectories will be available in the notebook.
Important
You may need to refresh the page in your browser to see the changes reflected.
Manage Files in the Notebook Interface
To upload a file from the host filesystem, click the Upload button at the top of
the left-hand sidebar.
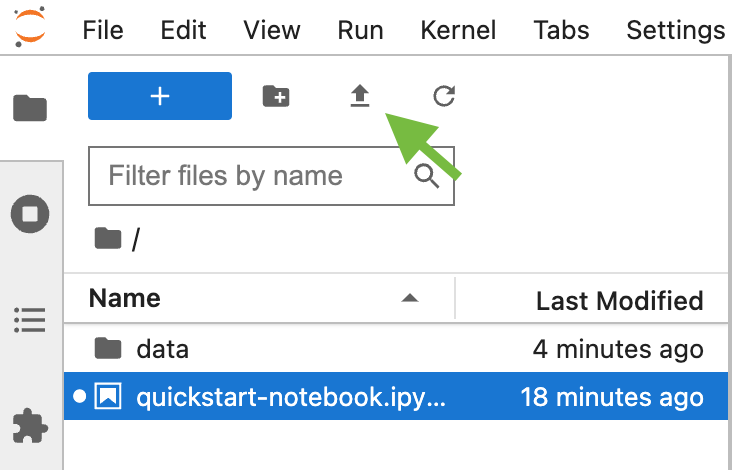
Tip
You can also drag and drop files into the sidebar to upload them.